
Search

What Are DTF Transfer Sheets and How Do They Work?

Dtf Transfer Sheets are printable films used to move detailed artwork onto fabric. They work with a direct-to-film printing process. A printer applies specialized ink to a coated sheet. Adhesive powder is then added to the wet print. Heat cures the adhesive and prepares the design for pressing.

The finished transfer feels like a thin, flexible layer. It can be pressed onto cotton, polyester, blends, and many finished garments. A heat press supplies controlled temperature, pressure, and time. These settings matter. Too little heat may cause weak adhesion. Excessive heat can damage fabric or distort fine details. Always check the transfer supplier’s instructions before production.

In hands-on testing, clean artwork and careful powder coverage make a visible difference. Small text needs enough thickness to remain readable after pressing. A lint-free surface also helps prevent unwanted marks. Dtf Transfer Sheets are popular because they support vivid colors, sharp edges, and small-batch customization without cutting individual letters. They are practical, but not flawless. Dark fabrics, textured materials, and repeated washing can produce different results. I have found that a test press is worth the extra few minutes. It exposes problems early. This guide explains the sheet structure, printing stages, curing process, and application methods. It also considers durability, storage, fabric compatibility, and common production mistakes. Reliable results come from measured settings, reputable materials, and realistic testing. Surface preparation matters.
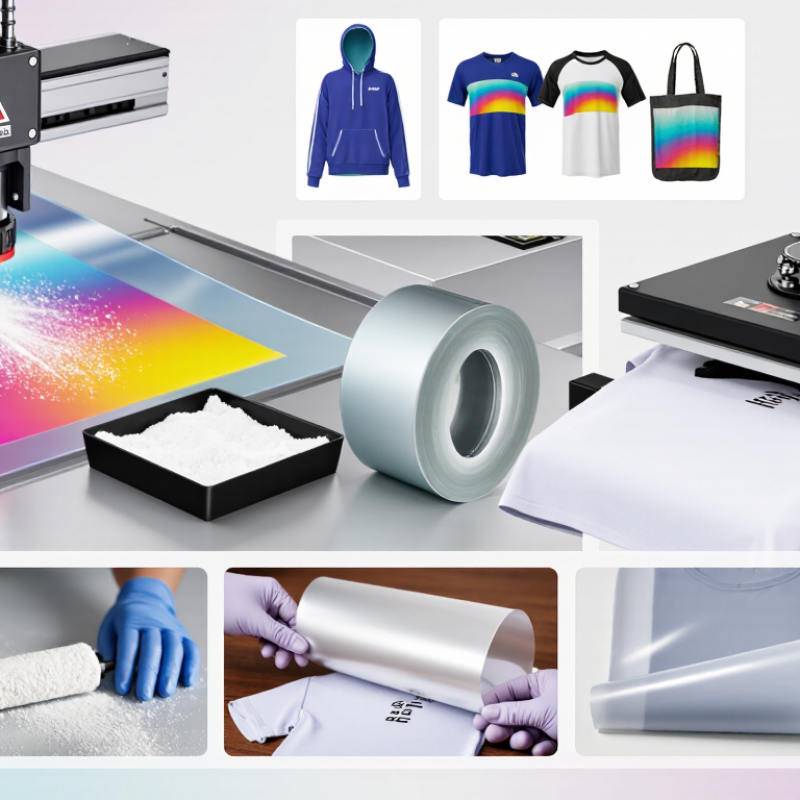
What Are DTF Transfer Sheets and How Do They Work?

DTF Transfer Sheets Defined: 75–100 μm PET Film and Release Coatings

DTF transfer sheets are clear PET films used to carry printed designs onto textiles. Most practical sheets measure 75–100 μm thick. That range balances flexibility, dimensional stability, and handling strength. Thinner film can curl or wrinkle during printing. Thicker film may feel less flexible during pressing.

The release coating is equally important. It controls how easily the cured adhesive separates from the film. A well-made coating supports clean powder adhesion and smooth transfer release. During production, operators should check coating consistency across the entire sheet. Uneven release can leave dull patches, missing edges, or scattered fibers. Small details matter.

The workflow is straightforward but not effortless. The printer places ink on the coated PET surface, usually in reverse order. White ink forms the base layer behind the colored image. Hot-melt adhesive powder then covers the wet ink. Heat melts the powder into a continuous adhesive layer. After curing, the sheet is pressed onto fabric with controlled temperature, pressure, and dwell time.

I have found that film thickness alone does not predict performance. Humidity, ink volume, powder coverage, and curing conditions also change results. A 100 μm sheet may feel stable, yet release poorly after excessive heating. A 75 μm sheet may transfer cleanly when stored and handled carefully. The process is reliable, but not automatic. Test swatches remain necessary.

Artwork Preparation: 300–600 DPI Files, CMYK Color, and White Ink

DTF transfer sheets begin with careful artwork preparation. A clean file usually needs 300–600 DPI at its final printed size. Low-resolution artwork may show jagged edges, especially around small letters and curved lines. Enlarging a blurry image rarely fixes the problem. It often makes the flaws easier to see.

CMYK color mode gives the artwork a more realistic print foundation. RGB files can look unusually bright on a screen, then appear dull after conversion. I check important colors with a printed proof whenever possible. Screen brightness can be misleading. Tiny color shifts may affect skin tones, shadows, and brand-neutral graphics. Leave enough space between fine details, too. Ink can soften slightly during printing and curing.

White ink forms the underbase beneath colored artwork. It helps the design remain visible on dark fabric. Transparent areas should stay transparent unless they are intentionally white. A poorly prepared white layer may create unwanted halos or uneven coverage. I also inspect the file at full size and zoomed in, because each view reveals different issues. In practice, I still miss small problems sometimes. A second review often catches them before production. Test prints are not wasteful; they reveal how colors, edges, and white ink behave on the actual material.

DTF Artwork Preparation: Resolution and Ink Separation

Pixel capacity for a 10 × 10 inch artwork prepared at common 300–600 DPI settings

A 10 × 10 inch file contains 9 million pixels at 300 DPI, 20.25 million pixels at 450 DPI, and 36 million pixels at 600 DPI. DTF artwork is commonly prepared in CMYK, which uses four process color channels, with an additional white-ink layer added when white ink is required. Higher DPI can preserve more fine detail, but it also increases file size and processing demands.

Film Printing and Powdering: 20–30 μm Adhesive Powder for Fabric Bonds

What Are DTF Transfer Sheets and How Do They Work?

DTF transfer sheets are PET films used to carry printed artwork onto fabric. The image is printed in reverse with textile pigment inks. A white ink layer usually supports stronger colors on dark garments. The film must remain clean, flat, and dry during handling.

The critical stage is powdering. Fine hot-melt adhesive powder, often measured at 20–30 μm, covers the wet ink surface. These particles should bond to the printed areas, not the empty film. Too little powder can create weak edges and peeling. Too much may leave a rough texture or dull the design. I have found that gentle shaking and controlled excess removal produce more consistent results than hurried brushing. Small details still need inspection.

The powdered film is then heated until the adhesive melts and forms an even layer. Curing temperature and time depend on the powder, ink load, and equipment. Heat too little, and the transfer may fail after washing. Heat too much, and the film or fabric can suffer. A test swatch is essential. I still question results that look perfect before washing. Fabric stretch, pressure, and wash conditions can expose hidden weaknesses. Keep powdering areas ventilated, follow technical safety guidance, and record each setting for repeatable production.

What Are DTF Transfer Sheets and How Do They Work? - Film Printing and Powdering: 20–30 μm Adhesive Powder for Fabric Bonds

Process Dimension Typical Data or Range How It Works Practical Notes
Transfer Sheet Material PET film, commonly about 75–100 μm thick A polyethylene terephthalate film carries the printed image and releases it after heat and pressure are applied. The film should remain flat, clean, and free from moisture or surface contamination.
Film Surface Cold-peel or hot-peel release coating The release layer controls how easily the cured graphic separates from the film during garment application. Peel behavior depends on the film coating, ink system, adhesive, temperature, and dwell time.
Artwork Preparation Mirror printing; transparent background The design is printed in reverse so that it appears correctly when transferred onto the fabric. A white ink layer is normally printed behind the color image. Transparent areas remain unprinted and do not receive adhesive unless the workflow adds a separate underbase.
Color Printing CMYK color layer with a white ink underbase CMYK inks create the visible image, while white ink improves opacity and color appearance on dark or colored textiles. White ink circulation and regular nozzle maintenance help reduce banding and uneven coverage.
Adhesive Powder Size 20–30 μm thermoplastic polyurethane powder The powder adheres to the wet ink, then melts into a continuous adhesive layer that bonds the graphic to textile fibers. Particle size affects coating uniformity, hand feel, melting behavior, and bond strength.
Powder Application Even coverage over all wet printed areas The printed film is passed through or shaken over the powder so that loose particles attach to the ink surface. Excess powder is removed before curing. Too little powder can weaken adhesion; excess powder may create a rough edge or unwanted background texture.
Powder Curing Approximately 120–160°C for about 2–5 minutes Heat melts the thermoplastic powder and forms a smooth adhesive layer without significantly damaging the PET film. Actual settings vary with powder formulation, layer thickness, oven airflow, and equipment calibration.
Transfer Press Temperature Approximately 140–160°C Heat reactivates the cured adhesive while pressure pushes the transfer into close contact with the textile surface. The correct temperature must be confirmed with the transfer and fabric specifications.
Pressing Time Approximately 10–20 seconds Dwell time allows the adhesive to soften, flow into the fabric surface, and develop a durable bond. Shorter times may cause incomplete bonding; excessive time can affect fabric appearance or transfer softness.
Pressure Level Medium to firm, commonly about 3–5 bar on pneumatic presses Pressure improves contact between the adhesive layer and the textile, especially on textured or tightly woven materials. Manual press pressure scales are not standardized, so testing is recommended for each fabric type.
Peeling Method Hot peel or cold peel, depending on the film A hot-peel film is removed shortly after pressing, while a cold-peel film is allowed to cool before removal. Peeling at the wrong temperature can lift fine details or cause partial image transfer.
Optional Second Press About 5–10 seconds with protective paper A second press can improve edge bonding, surface uniformity, and wash durability after the carrier film is removed. Use parchment paper, a finishing sheet, or another suitable protective layer as specified by the transfer system.
Compatible Fabrics Cotton, polyester, blends, and many treated textiles The polyurethane adhesive forms a surface bond with a broad range of fabrics without requiring a separate cutting-and-weeding step. Always test heat-sensitive, coated, water-repellent, elastic, or heavily textured fabrics before production.
Design Detail Capability Suitable for small text, gradients, and complex full-color artwork The image is printed digitally, so the process can reproduce photographic details and multi-color graphics without screen separation. Extremely fine lines may require sufficient white underbase control and accurate powder coverage.
Expected Hand Feel Flexible, slightly raised, and dependent on ink coverage The final feel is influenced by the printed area, adhesive thickness, powder formulation, curing profile, and fabric structure. Large solid graphics usually feel heavier than small or lightly covered designs.
Wash-Care Guidance Wash inside out at about 30°C; avoid chlorine bleach and high heat Gentle washing reduces mechanical stress and heat exposure on the printed adhesive layer. Durability depends on correct curing, pressing, fabric selection, detergent, agitation, and drying conditions.
Common Quality Issue Peeling edges or incomplete adhesion Possible causes include insufficient powder, inadequate curing, low press temperature, insufficient pressure, or short dwell time. Check temperature with a calibrated measurement method rather than relying only on the press display.
Common Quality Issue Powdery or rough surface Loose adhesive may remain because of uneven coating, incomplete melting, excessive powder, or inadequate removal before curing. Improve powder distribution, remove excess particles, and verify that the curing unit reaches the required temperature.
Storage Conditions Cool, dry, dust-free area; commonly below 25°C and below 60% relative humidity Stable storage helps prevent moisture absorption, film curling, powder clumping, and changes in adhesive performance. Keep unused sheets and powder sealed until use and allow materials to reach room temperature before printing.
Process Advantage No cutting or weeding for printed graphics The digital print-and-powder workflow transfers the complete image, reducing manual preparation for detailed or multi-color designs. The process still requires accurate powder control, curing, heat pressing, and routine equipment maintenance.

Curing the Transfer: 160–170°C for 2–3 Minutes Before Pressing

What Are DTF Transfer Sheets and How Do They Work?

DTF transfer sheets carry printed artwork and adhesive powder onto fabric. The powder must be cured before the transfer reaches the heat press. A practical starting point is 160–170°C for 2–3 minutes. During curing, the powder melts into a smooth adhesive layer. It should look even, without dry white grains or darkened patches.

Temperature alone does not guarantee a good result. Powder depth, airflow, and curing equipment can change the outcome. A thin layer may cure quickly, while heavy coverage needs more attention. I have found that rushing this stage often causes lifting edges after washing. Overheating can also weaken the adhesive or distort fine details. The exact settings are not universal, so test a small transfer first. That extra test can feel inefficient, but it prevents larger failures.

Tips: Keep the printed sheet level during curing. Watch the powder, not only the timer. Use suitable ventilation, and avoid touching the adhesive surface before pressing. After curing, press the transfer according to the fabric and adhesive instructions. Allow the garment to cool before peeling when required. Check the corners after the first wash; they reveal problems quickly.

Heat-Press Application: 150–165°C for 10–15 Seconds on Cotton Textiles

What Are DTF Transfer Sheets and How Do They Work?

Direct-to-film (DTF) transfer sheets carry a printed design on a coated film. Fine adhesive powder bonds the ink layer after curing. A heat press then transfers the image onto cotton fabric. This process supports detailed graphics without cutting individual letters or shapes.

For cotton textiles, set the press between 150 and 165°C. Apply firm, even pressure for 10–15 seconds. The lower setting suits heat-sensitive fabrics, while the higher setting can improve adhesive bonding. Always test a fabric swatch first. Cotton varies in weave, dye, and moisture content. I have seen edges lift when the fabric was slightly damp. That small detail matters.

Keep the sheet flat and place a protective cover above it. Follow the transfer’s recommended peel method, whether hot, warm, or cold. A 2023 Grand View Research assessment valued the global digital textile printing market at approximately US$2.46 billion in 2022, with projected annual growth above 12% through 2030. DTF belongs to this expanding digital workflow, although market reports often group several technologies together. That limitation deserves attention. The heat-press result also depends on pressure accuracy, curing quality, and washing conditions. After pressing, allow the cotton surface to cool before checking adhesion. Wash inside out, using moderate temperature, and avoid aggressive drying during early tests.